
SPICE (Simulation Program with Integrated Circuit Emphasis) ist die wohl bekannteste Software zur Simulation analoger und digitaler elektrischer Schaltungen. Allerdings ist die Nutzung oft mühsam und erfordert einen geeigneten Schaltplan. Wie gut, dass es inzwischen eine grafische Benutzeroberfläche gibt, die Sie online und ohne Installation von Software benutzen können und in der Sie die Schaltung wie auf einem Breadboard aufbauen. Tinkercad Circuits bietet sogar die Integration von ATmega- (Arduino Uno) und ATtiny-Prozessoren, für die Sie Programme in C/C++ sowie der grafischen Sprache Scratch erzeugen und ausführen können.
Register on the page https://www.tinkercad.com.To do this, you can create a new account or register with a third party like Google.In the dashboard, switch to the circuit area - as the new user, no circuit designs will be seen.At the bottom you may be able to change the language to German.
The following project can also be found online at https://www.tinkercad.com/things/az1gbrxuclz.
Click Create a new circuit.The Breadboard view resembles Fritzing in many places, so it is advantageous if you familiarize yourself with it in advance and read the article (see last issue).
Ihr Entwurf wird permanent in der Cloud gespeichert. Oben links neben dem Logo von Tinkercad wurde dazu bereits ein phantasievoller Name festgelegt. Sie können auf den Text klicken und einen eigenen Projektnamen vergeben.
On the right edge you can make a pre -selection which components and sample projects are displayed.In the selection list there are some examples below starter that you can try out.So that you create a new project from scratch, select "All" for components.
Find the electricity source (laboratory power supply), the Arduino Uno◦R3 and the small slab from the component selection.Click the respective symbol and then put the component in the work area.
For many components, you can define parameters such as color, type or dimensioning if you click the component in the work area.A small dialog window with the setting options then opens.Click the power source and enter "5" when tension.With all values, note that you use the US notification for numbers with a decimal point instead of a comma.
Platzieren Sie die Bauteile und Leitungen auf dem Breadboard. In der Grafik sehen Sie, welche Werte Sie für die Bauteile einstellen müssen (soweit möglich).
In addition, a connection to a GND pin on the Arduino is necessary (black line to the right) and the blue connection to Pin◦a2.
If you have fully built the circuit, you can test and simulate the electrical function by starting simulation in the top right.The USB connector is inserted into the Arduino in a short animation to show that it is now supplied with electricity (the LED "On" also shines).However, there is still no program that runs on it.In addition, the voltage and the current electricity are displayed on the laboratory power supply.
You can turn the rotary buttons of the power supply by pressing the mouse button.The circuit itself tolerates up to about 18◦V - but not the Arduino, which is connected via the blue line.In practice, you would destroy your microcontroller with it - it doesn't hurt here.The piezo number gives a rattling tone if you have connected a speaker on your PC.With the mouse you can adjust the blue potentiometer on the top left of the plug -in board by turning and thereby change the sound.
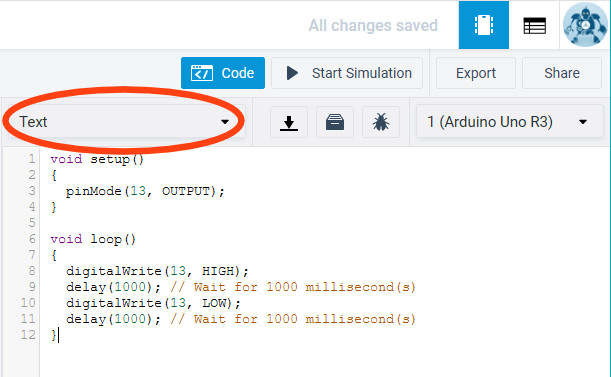
Klicken Sie auf Simulation stoppen und dann auf Code (links daneben), um das Eingabefenster für den Quellcode zu öffnen. Vom rechten Rand schiebt sich die Codeansicht ins Bild. Diese zeigt zuerst den Editor für Scratch. Stellen Sie oben über das Auswahlfeld auf Text um. Es wird eine Warnung angezeigt, die Sie mit Weiter bestätigen.
There is already a small program in the code window.Delete the entire content and replace it with the following commands:
Const uint8_t iopin = a2;
void setup ()
{
Pinmode (iopin, input);
Serial.begin (9600);
}
void loop()
{
Serial.println (digital read (iopin));
Delay (10);
}
If you now click on Simulation again, the program code will also be carried out.If your program contains errors, as in the Arduino IDE, these will be highlighted and must first be removed.
In this example, the Arduino is supposed to work like a simple oscilloscope and output the signal level on its I/O pin, which corresponds to the signal that drives the piezo number.To do this, click Serial Monitor at the bottom of the code view so that you see the episode of zeros and one.At the bottom right there is a symbol with a curve: Click to open the graphical edition.
Turn back on the potentiometer to change the sound and see how the drawn curve changes.
The article was taken from the special issue "Entering the Electronics with Arduino", which can be ordered in the ELECTOR-SHOP: www.elektor.de/elector-special-sinstection-in-elektronik-mit-Arduino.
Do you want to read other elector articles?Now become an elktor member and don't miss anything!
